
A Simple Item Display
Considering the amount of collectibles in Skyrim, there is, without doubt, a huge lack of displays!
This tutorial will show you how to set up a single item display for your goodies.
You will also need THIS which includes 2 versions of the display script, a single object display script
and a multi object script for up to 15 items, though it can be used for any amount up to the maximum of 15.
As I said, in this tutorial I will be using the single item script but the multi item version is exactly
the same...except with more objects!
These scripts are for MiscItems only, they will not work for armour, weapons, potions etc, though I probably
will make and post versions for those soon!
Lets begin.
Firstly you will need to find the object you wish to display in the ck and position it in your mod where
you want it to appear once placed in-game. I've gone for Torsten's Skull Key for this example.
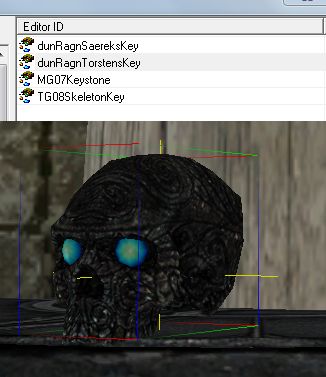
Next, with the item selected click the cubed T button to create a new trigger and double click <New>.
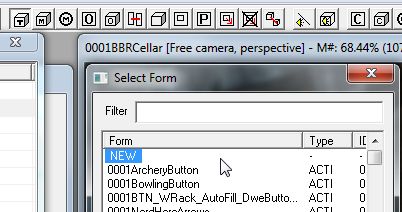
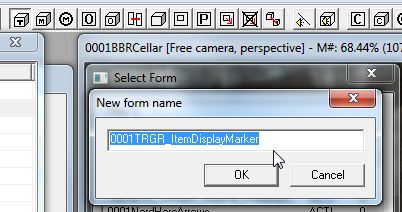
Give your new trigger a unique name that identifies it and click OK. this trigger will be the marker
where your item appears in-game.
Click OK again when the new triggers properties window opens as there is nothing needed to be messed with
in here and your new trigger will appear around your selected item, now double click the trigger to open
it's "Reference" properties and move it off the render window and double click the item.
You will notice that the X, Y, Z coordinates may not match,
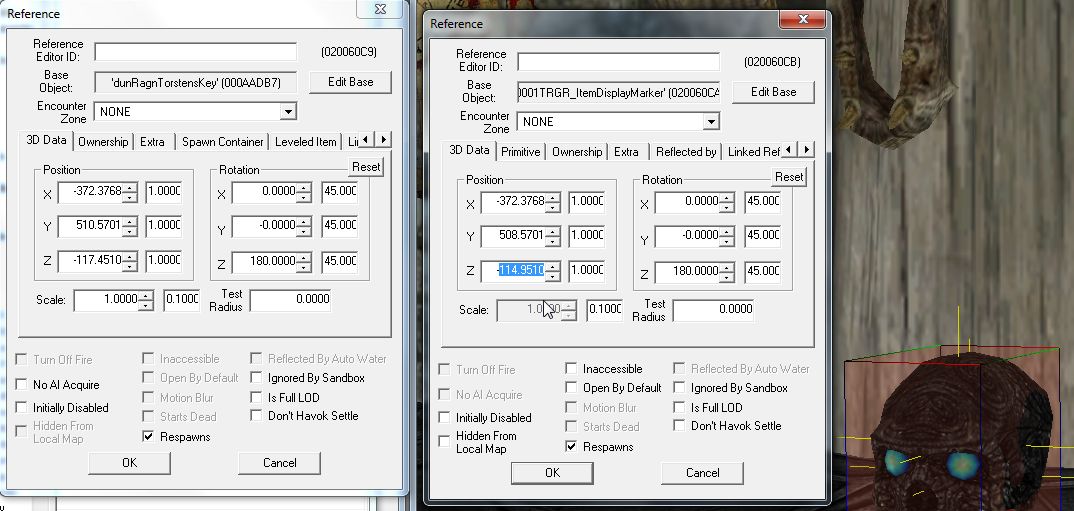
Copy and paste from the items X, Y, Z's into the trigger to synchronize their positions and click OK.
(Note, sometimes the CK will not update the last change you made to the settings so it's best to click
in another settings box to ensure this takes place!!)
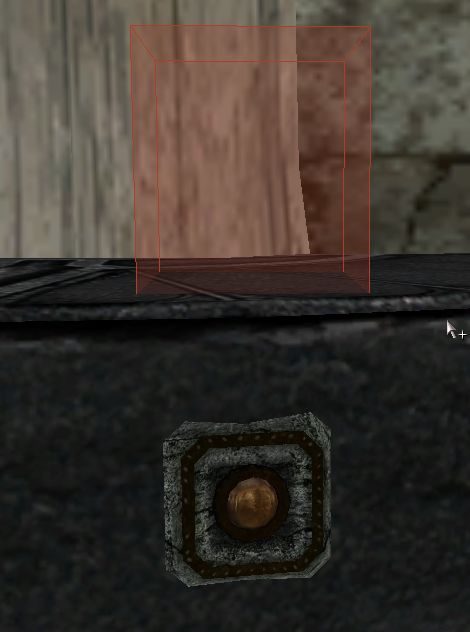
You should now have both item and trigger in exactly the same position, notice that in the last image
there were 2 yellow center line pointing out of the sides, front and top but in this image there is
only 1.

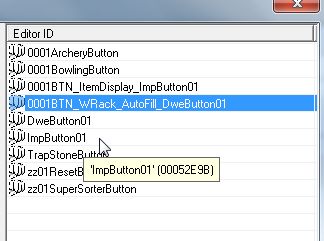
Now in the <Acivator> section find a button you like (I've gone for the Imperial button), select it
and hit F2 to rename the button, once renamed hit <Enter> twice and you now have a new button to work
with.
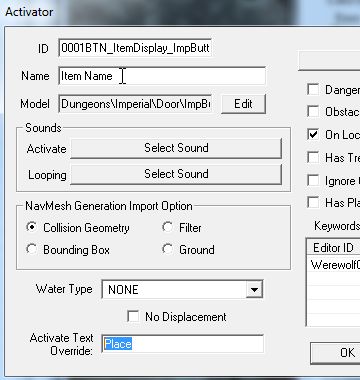
Double click the new button and add the word "Place" to the <Activate Text Override> section at the
bottom and place the name of the item in <Name>. (Mine says "Item Name" in the image just to show
where but in a mod it would say "Torsten's Skull Key")
Click OK and drag the button into the render window and put it in position.
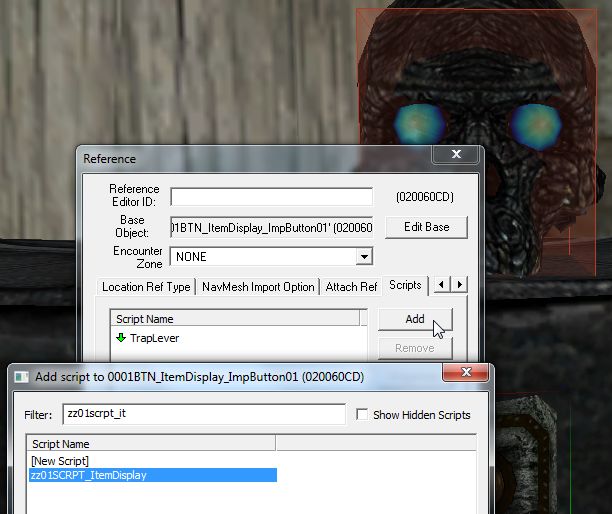
Now double click the button in the render window and on the <Scripts> tab click <Add> and find the
ItemDisplay script (MultiItemDisplay for the multi script).
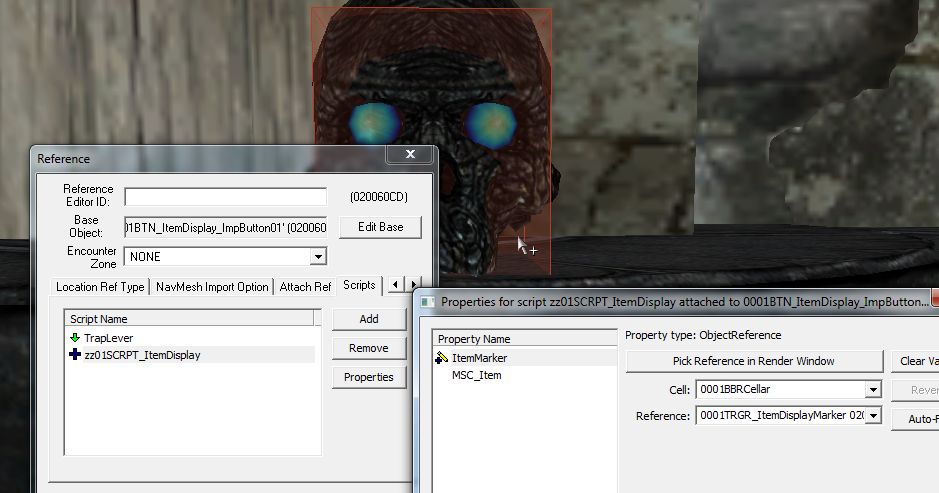
Double click the script to place it in the Button then click <Settings> and you will find there are
two (per item for the multi version) that need to be set. Click <ItemMarker>, <Edit Value> and
<Pick Reference In Render Window> and your cursor will turn into a small target, now double click that
target on the trigger box.
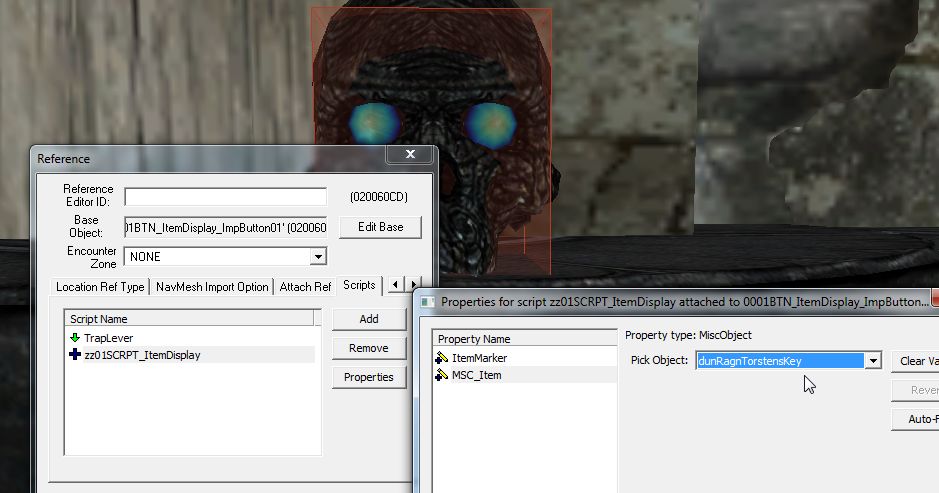
For MSC_Item click <Edit Value> and in the drop-down box find the item that you want to be displayed.
Once done click OK all the way out and select the item you placed for setting the marker trigger and hit
<Delete> and you should now be left with the button and the trigger.
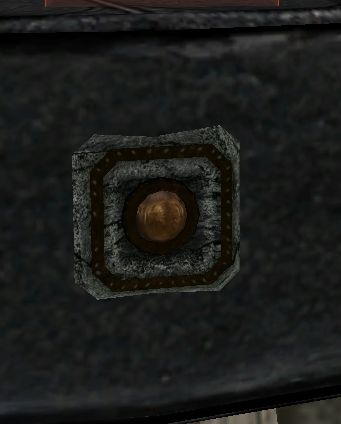
Thats it! Your all done, go in-game and try it out!
Considering the amount of collectibles in Skyrim, there is, without doubt, a huge lack of displays!
This tutorial will show you how to set up a single item display for your goodies.
You will also need THIS which includes 2 versions of the display script, a single object display script
and a multi object script for up to 15 items, though it can be used for any amount up to the maximum of 15.
As I said, in this tutorial I will be using the single item script but the multi item version is exactly
the same...except with more objects!
These scripts are for MiscItems only, they will not work for armour, weapons, potions etc, though I probably
will make and post versions for those soon!
Lets begin.
Firstly you will need to find the object you wish to display in the ck and position it in your mod where
you want it to appear once placed in-game. I've gone for Torsten's Skull Key for this example.
Next, with the item selected click the cubed T button to create a new trigger and double click <New>.
Give your new trigger a unique name that identifies it and click OK. this trigger will be the marker
where your item appears in-game.
Click OK again when the new triggers properties window opens as there is nothing needed to be messed with
in here and your new trigger will appear around your selected item, now double click the trigger to open
it's "Reference" properties and move it off the render window and double click the item.
You will notice that the X, Y, Z coordinates may not match,
Copy and paste from the items X, Y, Z's into the trigger to synchronize their positions and click OK.
(Note, sometimes the CK will not update the last change you made to the settings so it's best to click
in another settings box to ensure this takes place!!)
You should now have both item and trigger in exactly the same position, notice that in the last image
there were 2 yellow center line pointing out of the sides, front and top but in this image there is
only 1.
Now in the <Acivator> section find a button you like (I've gone for the Imperial button), select it
and hit F2 to rename the button, once renamed hit <Enter> twice and you now have a new button to work
with.
Double click the new button and add the word "Place" to the <Activate Text Override> section at the
bottom and place the name of the item in <Name>. (Mine says "Item Name" in the image just to show
where but in a mod it would say "Torsten's Skull Key")
Click OK and drag the button into the render window and put it in position.
Now double click the button in the render window and on the <Scripts> tab click <Add> and find the
ItemDisplay script (MultiItemDisplay for the multi script).
Double click the script to place it in the Button then click <Settings> and you will find there are
two (per item for the multi version) that need to be set. Click <ItemMarker>, <Edit Value> and
<Pick Reference In Render Window> and your cursor will turn into a small target, now double click that
target on the trigger box.
For MSC_Item click <Edit Value> and in the drop-down box find the item that you want to be displayed.
Once done click OK all the way out and select the item you placed for setting the marker trigger and hit
<Delete> and you should now be left with the button and the trigger.
Thats it! Your all done, go in-game and try it out!